Month: November 2020

Symfony Development

How To Create Api in Symfony 4 using JSON data ?

Here, I will show you how to create Api in symfony for beginners.
Step 1:
Navigate to project directory & run below command for create fresh project.

composer create-project symfony/skeleton [project-name]
Step 2:
Now Navigate to project path & Create controller via below command.

php bin/console make:controller
Step 3:
Open that controller, now we need to create three methods for api, first of all we look into listing method which make the list of given JSON array [ index() ]

/**
* @Route(“/api/user”, name=”api_user”)
*/
public function index(Request $request)
{
//initilize array
$data = array();
$userArr = array();

// make api request
$request_user_url = ‘../users.json’;
$request_user_result = file_get_contents( $request_user_url );
$user_details = json_decode( $request_user_result, true );

foreach ($user_details as $user)
{
$userArr[‘id’] = $user[‘id’];
$userArr[‘name’] = $user[‘name’];
$userArr[‘date’] = $user[‘date’];
$userArr[‘address’] = $user[‘address’];
$userArr[‘last_modified’] = $user[‘last_modified’];

array_push($data, $userArr);
}

return new JsonResponse(array(‘data’ => $data, ‘count’ => count($data)));
}

Step 4:

Second method for update the JSON data [ update() ]

/** * @Route(“/api/user-update/{id}/{name}/{date}/{address}”, name=”api_user_update”) */
public function update( Request $request, $name = null, $date = null, $address = null ) {
$status = ‘error’;
$message = ‘User not found!’;
$id = $request->get(‘id’);
$name = $request->get(‘name’);
$date = $request->get(‘date’);
$address = $request->get(‘address’);
// make api request
$request_user_url = ‘../users.json’;
$request_user_result = file_get_contents( $request_user_url );
$user_details = json_decode( $request_user_result, true );
foreach ( $user_details as $key => $value ) {
if( $value[‘id’] == $id ) {
if( $name != null ) {
$user_details[$key][‘name’] = $name;
}
if( $date != null) {
$user_details[$key][‘date’] = $date;
}
if( $address != null ) {
$user_details[$key][‘address’] = $address;
}
$user_details[$key][‘last_modified’] = date(‘Y-m-d H:i:s’);
// updates the specific user..
$status = ‘success’;
$message = ‘User details update successfully!’;
}
}

// encode array to json and save to file

file_put_contents($request_user_url, json_encode($user_details));
return new JsonResponse(array(‘status’ => $status, ‘message’ => $message));
}

Step 5:
Third method for delete the JSON data [ delete() ]

/** * @Route(“/api/user-delete/{id}”, name=”api_user_delete”) */
public function delete(Request $request) {
$status = ‘error’;
$message = ‘User not found!’;
$userId = $request->get(‘id’);

// make api request

$request_user_url = ‘../users.json’;
$request_user_result = file_get_contents( $request_user_url );
$user_details = json_decode( $request_user_result, true );
foreach ( $user_details as $key => $value )
{
if( $value[‘id’] == $userId ) {
// delete specific user..
unset($user_details[$key]); $status = ‘success’; $message = ‘User deleted successfully!’;
}
}

// encode array to json and save to file

file_put_contents($request_user_url, json_encode($user_details));
return new JsonResponse(array(‘status’ => $status, ‘message’ => $message));
}

That’s all, thanks for reading our blog, hope this will help a lot to you.

7
Symfony Development

How to create cron in symfony?

Here, I will show you how to create cron in symfony.

Step 1:

Navigate to Project Directory.

Step 2:

create a Cron Task using this command.

php bin/console make:command app:[cron-name]

and it will generate a [cron-name]Command.php.

this file have two methods : configure() and execute().

Step 3 – Configuration:

in configure method, there are some configuration in this method like description, argument, and options.

$this->setDescription(‘Add a short description for your command’)
->addArgument(‘arg1’, InputArgument::OPTIONAL, ‘Argument description’)
->addOption(‘option1’, null, InputOption::VALUE_NONE, ‘Option description’)
;

Step 4 – Execution :

In execute method have some code that will be execuated.

protected function execute(InputInterface $input, OutputInterface $output): int
{
$io = new SymfonyStyle($input, $output);
$arg1 = $input->getArgument(‘arg1’);

if ($arg1) {
$io->note(sprintf(‘You passed an argument: %s’, $arg1));
}

if ($input->getOption(‘option1’)) {
// …
}

$io->success(‘You have a new command! Now make it your own! Pass –help to see your options.’);

return Command::SUCCESS;
}

Step 5 – Run Cron :

Now Open a command-line and run this command
`php bin/console app:[cron-name]`

now its have an output.

Thanks for reading.

Laravel Development

How to fix Some Migration error in Laravel?

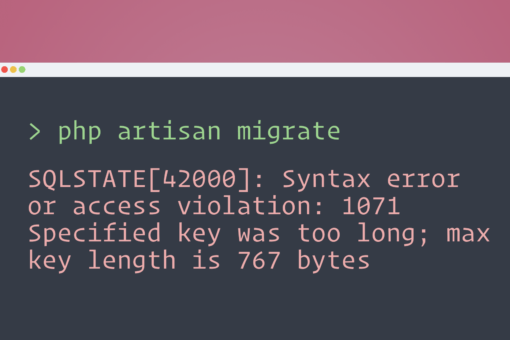
How to fix SQLSTATE[42000]: Syntax error or access violation: 1071 Specified key was too long; max key length is 1000 bytes error?

Step 1 :

Open App/provider/AppServiceProvider.php
and add the following code.

use Illuminate\Support\Facades\Schema;

class AppServiceProvider extends ServiceProvider
{
/**
* Bootstrap any application services.
*
* @return void
*/
public function boot()
{
Schema::defaultStringLength(191);
}
}

Thanks for reading this article. I hope it will help you.

Laravel Development

Database: Migrations – Laravel

Introduction: 
Migrations are like version control for your database, allowing your team to modify and share the application’s database schema. Migrations are typically paired with Laravel’s schema builder to build your application’s database schema. If you have ever had to tell a teammate to manually add a column to their local database schema, you’ve faced the problem that database migrations solve.
Generating Migrations: 

To create a migration, use the make:migration Artisan command:
php artisan make:migration create_users_table
The new migration will be placed in your database/migrations directory. Each migration file name contains a timestamp, which allows Laravel to determine the order of the migrations.
The –table and –create options may also be used to indicate the name of the table and whether or not the migration will be creating a new table. These options pre-fill the generated migration stub file with the specified table:
php artisan make:migration create_users_table –create=usersphp artisan make:migration add_votes_to_users_table –table=users
If you would like to specify a custom output path for the generated migration, you may use the –path option when executing the make:migration command. The given path should be relative to your application’s base path.

Migration Structure:

A migration class contains two methods: up and down. The up method is used to add new tables, columns, or indexes to your database, while the down method should reverse the operations performed by the up method.
Within both of these methods you may use the Laravel schema builder to expressively create and modify tables. To learn about all of the methods available on the Schema builder, check out its documentation. For example, the following migration creates a flights table:

<?php

use Illuminate\Database\Migrations\Migration;
use Illuminate\Database\Schema\Blueprint;
use Illuminate\Support\Facades\Schema;

class CreateFlightsTable extends Migration
{
/**
* Run the migrations.
*
* @return void
*/
public function up()
{
Schema::create(‘flights’, function (Blueprint $table) {
$table->id();
$table->string(‘name’);
$table->string(‘airline’);
$table->timestamps();
});
}

/**
* Reverse the migrations.
*
* @return void
*/
public function down()
{
Schema::drop(‘flights’);
}
}

Running Migration:

To run all of your outstanding migrations, execute the migrate Artisan command:
php artisan migrate

Forcing Migrations To Run In Production:

Some migration operations are destructive, which means they may cause you to lose data. In order to protect you from running these commands against your production database, you will be prompted for confirmation before the commands are executed. To force the commands to run without a prompt, use the –force flag:
php artisan migrate –force

Rolling Back Migrations:

To roll back the latest migration operation, you may use the rollback command. This command rolls back the last “batch” of migrations, which may include multiple migration files:
php artisan migrate:rollback
You may roll back a limited number of migrations by providing the step option to the rollback command. For example, the following command will roll back the last five migrations:
php artisan migrate:rollback –step=5
The migrate:reset command will roll back all of your application’s migrations:
php artisan migrate:reset

Roll Back & Migrate Using A Single Command:

The migrate:refresh command will roll back all of your migrations and then execute the migrate command. This command effectively re-creates your entire database:
php artisan migrate:refresh// Refresh the database and run all database seeds…
php artisan migrate:refresh –seed
You may roll back & re-migrate a limited number of migrations by providing the step option to the refresh command. For example, the following command will roll back & re-migrate the last five migrations:
php artisan migrate:refresh –step=5

Drop All Tables & Migrate:

The migrate:fresh command will drop all tables from the database and then execute the migrate command:
php artisan migrate:fresh
php artisan migrate:fresh –seed

Thanks For Reading this article. I hope it will help you.

Laravel Development

How to create pdf in Laravel 5?

In this article, I will Show you how to create pdf in Laravel 5.

Step 1: 

Install the composer package for pdf in project directory using this command.
composer require barryvdh/laravel-dompdf

Step 2:

Configure this package in app/config.php and add the following code.

‘providers’ => [
Barryvdh\DomPDF\ServiceProvider::class,
],

‘aliases’ => [
‘PDF’ => Barryvdh\DomPDF\Facade::class,
],

Step 3:

Now create route  in route/web.php  and add the following code.

Route::get(‘pdfview’,array(‘as’=>’pdfview’,’uses’=>’PolicyController@pdfview’));

Step 4:

Add code in controller app/Http/Controllers/PolicyController.php.

class PolicyController extends Controller
{
public function pdfview(Request $request)
{
$items = DB::table(“items”)->get();
view()->share(‘items’,$items);
if($request->has(‘download’)){
$pdf = PDF::loadView(‘pdfview’);
return $pdf->download(‘pdfview.pdf’);
}
return view(‘pdfview’);
}
}

Step 5: 

Now create a blade file for PDF data.
Open file resources/view/admin/policy/pdfview.blade.php  and add the following code.

<a href=”{{ route(‘pdfview’,[‘download’=>’pdf’]) }}”>Download PDF</a>
<table>
<tr>
<th>No</th>
<th>Policy Name</th>
<th>Policy Category</th>
</tr>
@foreach ($items as $key => $item)
<tr>
<td>{{ ++$key }}</td>
<td>{{ $item->name }}</td>
<td>{{ $item->category }}</td>
</tr>
@endforeach
</table>

Thanks For Reading this article. I hope it will help you.

23
×