Month: July 2021

send email using phpmailer
Angular JS

How To Send Email Using PHPMailer And Angular JS

hello there, in this tutorial we will discuss send Email Using phpmailer and Angular JS. So we need to go through the basics of phpmailer and how to use the service of phpmailer? so let’s start with the basics. what is PHPMailer ? Many PHP developers need to send emails from their code. The only PHP function that supports this directly is mail(). However, it does not provide any assistance for making use of popular features such as encryption, authentication, HTML messages, and attachments. Formatting email correctly is surprisingly difficult. There are myriad overlapping (and conflicting) standards, requiring tight adherence to horribly complicated formatting and encoding rules – the vast majority of code that you’ll find online that uses the mail() function directly is just plain wrong, if not unsafe! The PHP mail() function usually sends via a local mail server, typically fronted by a sendmail binary on Linux, BSD, and macOS platforms, however, Windows usually doesn’t include a local mail server; PHPMailer’s integrated SMTP client allows email sending on all platforms without needing a local mail server. Be aware though, that the function should be avoided when possible; it’s both faster and safer to use SMTP to localhost. Features Of PHPMailer. Probably the world’s most popular code for sending email from PHP!Used by many open-source projects: WordPress, Drupal, 1CRM, SugarCRM, Yii, Joomla! and many moreIntegrated SMTP support – send without a local mail serverSend emails with multiple To, CC, BCC and Reply-to addressesMultipart/alternative emails for mail clients that do not read HTML emailSupport for UTF-8 content and 8bit, base64, binary, and quoted-printable encodingsSMTP authentication with LOGIN, PLAIN, CRAM-MD5, and XOAUTH2 mechanisms over SMTPS and SMTP+STARTTLS transportsValidates email addresses automaticallyProtects against header injection attacks if you want to know more about it please visit this link. How To Send Email Using PHPMailer? so in this tutorial, we gonna use phpmailer as we use in PHP and we will use the ajax method in this tutorial so if you don’t know how to use ajax in angular js, please learn from our previous tutorial which you can visit directly from here. Send Email Using PHPMailer And Angular JS. so here we will discuss that how to integrate PHPMailer with and how to send Emails using phpmailer and angular js. so here we need to create one simple form using HTML, CSS, or bootstrap. here we created a form using bootstrap so let’s check out that form.
<!DOCTYPE html>
<html lang="en">
<head>
  <meta charset="utf-8">
  <meta name="viewport" content="width=device-width, initial-scale=1, shrink-to-fit=no">
  <meta name="description" content="">
  <meta name="author" content="">
  <title>Send Email Using Angular JS</title>
  <!-- Bootstrap core CSS -->
  <link rel="stylesheet" href="https://stackpath.bootstrapcdn.com/bootstrap/4.4.1/css/bootstrap.min.css" integrity="sha384-Vkoo8x4CGsO3+Hhxv8T/Q5PaXtkKtu6ug5TOeNV6gBiFeWPGFN9MuhOf23Q9Ifjh" crossorigin="anonymous">
  <script src="https://ajax.googleapis.com/ajax/libs/angularjs/1.6.9/angular.min.js"></script>
</head>
<body>
  <div class="container-fluid" ng-app="mailApp" ng-controller="mailC">
      <div class="row">
  	 <div class="col-md-12">
            <div class="d-flex justify-content-center col-md-12">
               <form name="Form1">
  		 <h1>Send Email Using Angular JS and PHPMailer</h1>
  		<div id="msg"></div>
  		<label>Enter Reciver Email Address</label>
  		<input type="email" name="rEmail" ng-model="receiver_email" class="form-control" required>
  		<label>Subject</label>
                <input type="text" ng-model="subject" class="form-control">
                <label>Enter Message</label>
  		<textarea class="form-control" cols="12" rows="5" ng-model="message"></textarea>
               <div class="d-flex justify-content-center">
  	       <button class="btn btn-secondary mt-3" ng-click="sendEmail()">Send Email</button>
            <div>
  	</form>
     </div>
  </div>
 </div>
</div>	
  <!-- Bootstrap core JavaScript -->
  <script src="https://code.jquery.com/jquery-3.4.1.slim.min.js" integrity="sha384-J6qa4849blE2+poT4WnyKhv5vZF5SrPo0iEjwBvKU7imGFAV0wwj1yYfoRSJoZ+n" crossorigin="anonymous"></script>
  <script src="https://cdn.jsdelivr.net/npm/popper.js@1.16.0/dist/umd/popper.min.js" integrity="sha384-Q6E9RHvbIyZFJoft+2mJbHaEWldlvI9IOYy5n3zV9zzTtmI3UksdQRVvoxMfooAo" crossorigin="anonymous"></script>
  <script src="https://stackpath.bootstrapcdn.com/bootstrap/4.4.1/js/bootstrap.min.js" integrity="sha384-wfSDF2E50Y2D1uUdj0O3uMBJnjuUD4Ih7YwaYd1iqfktj0Uod8GCExl3Og8ifwB6" crossorigin="anonymous"></script>
</body>
</html>
here is the output for the above code. here we provided an email address, subject, and message you have to fill this form and submit this form here we see how to submit this form using angular JS. setting up angular js for submitting form.
<script>
    var app = angular.module('mailApp', []);
    app.controller('mailC',function($scope,$http){
    $scope.sendEmail = function(){
    $http.post('api/sendEmail.php',{'receiverEmail':$scope.receiver_email,'subject':$scope.subject,'message':$scope.message}).then(function(res){
          $scope.reciver_email = "";
          $scope.subject = "";
          $scope.message = "";
          $("#msg").append(res.data);
        });
      }
    });
  </script>
so you can see that we did call the sendEmail.php file and we used ajax for the send email using phpmailer. we completed the front-end of this tutorial now we have to move to the backend.
<?php
error_reporting(0);
$data = json_decode(file_get_contents("php://input"),true);
$receiverEmail = $data['receiverEmail'];
$subject = $data['subject'];
$message = $data['message'];
	use PHPMailer\PHPMailer\PHPMailer;
  	use PHPMailer\PHPMailer\Exception;
    
  	require '../vendor/autoload.php';
    
  	  $mail = new PHPMailer(true);
    
      $mail->isSMTP();                                            
      $mail->Host       = 'smtp.gmail.com;';                    
      $mail->SMTPAuth   = true;                             
      $mail->Username   = 'your email address';                 
      $mail->Password   = 'your email password';                        
      $mail->SMTPSecure = 'tls';                              
      $mail->Port       = 587;  
      $mail->setFrom('your Email address', 'your nick name for email');           
      $mail->addAddress($reciverEmail);
      $mail->isHTML(true);                                  
      $mail->Subject = $subject;
      $mail->Body    = $message;
      $mail->AltBody = 'Body in plain text for non-HTML mail clients';
      try{
      if($mail->send()){
        echo '<div class="alert alert-success alert-dismissible fade show" role="alert">
    <strong>Success !</strong> your Email is sent.
    <button type="button" class="close" data-dismiss="alert" aria-label="Close">
    <span aria-hidden="true">&times;</span>
    </button>
    </div>';
      }
  } catch (Exception $e) {
      echo '<div class="alert alert-danger alert-dismissible fade show" role="alert">
    <strong>Success !</strong> your Email is Not sent.
    <button type="button" class="close" data-dismiss="alert" aria-label="Close">
    <span aria-hidden="true">&times;</span>
    </button>
    </div>';
  }
  
?>
so here it is completed with the front-end as well as the backend if you want to learn how to send SMS using PHP then visit this link.
crud operation with angular js
Angular JS

CRUD Operation Using Angular JS, AJAX, AND PHP.

Hello, there in this blog we are discussing angular JS. we need to understand what is angular JS? how actually it works with PHP? How can we use ajax in angular js with crud operation With Angular JS PHP and AJAX? What is Angular JS? Angular JS is developed And mainly by google’s angular Team. AngularJS is a structural framework for dynamic web apps. It lets you use HTML as your template language and lets you extend HTML’s syntax to express your application’s components clearly and succinctly. AngularJS’s data binding and dependency injection eliminate much of the code you would otherwise have to write. And it all happens within the browser, making it an ideal partner with any server technology. if you want to know more about angular js visit this link. Why we use angular JS? Angular projects offer a great way to build single-page client applications by implementing HTML and Typescript functionalities. so here are some steps to code an angular js application. The first Steps involes that you must have knowledge about HTML, CSS, and Typescript. note typescript is not mendatory but you must know write code of HTML And CSS is required.you must have basic knowledge about javascript. because at the end you have to do scripting your application.in angular js navigation between different views is defined by service called route so your page will be same but your contant will be change as your request.angular js provide synchronization or data-binding occurs between your modal and view components, this offerning a reactive user experience. Therefore, the building blocks of the Angular workspace are fit for designing impressive Single Page Applications (SPAs). angular JS first hello world application using HTML and Angular JS.
<html>
<head>
<title>Hello World Using Angular JS</title>
<script src="https://ajax.googleapis.com/ajax/libs/angularjs/1.6.9/angular.min.js"></script>
</head>
<body>
<div ng-app="" ng-init="hello='Hello World!'">
<p> {{ hello }} </p>
</div>
</body>
</html>
Here is the output for this practical, so in this tutorial, we are not gonna through the basics of angular js if you want to learn more about angular js then visit this website. How HTML Forms data binding with Angular JS and How we use form Data for CRUD Operation Using Angular JS AND PHP? so in this section, we will learn about how we get data from the form in angular JS and how we will use that data for crud operation using angular js and PHP. How To Bind Data From The Form In Angular JS? so here is the sample code for bind data from the form in angular JS.
<!DOCTYPE html>
<html>
<head>
<title>Data Binding in Angular JS</title>
<script src="https://ajax.googleapis.com/ajax/libs/angularjs/1.6.9/angular.min.js"></script>
</head>
<body>
<div ng-app="">
Name: <input ng-model="name">
<h1>You entered: {{name}}</h1>
</div>
</body>
</html>
here is the output for this practical. so in angular JS, we use ng-modal to bind HTML data with angular JS application. if you want to know more about angular JS modal then visit this website. How to do CRUD Operation Using Angular JS? so till now, we learn what is angular js and how to bind HTML data with angular js Applications. we need to generate our project structure for this practical. we will do all the operation step by step so you can easily understand and implement by your self. File structure for crud operation using angular JS. so in this tutorial, we gonna follow this file structure, in the API folder, you can see that different files are there which specifies why and what is the use of that files. so as a name suggest delete.php file will use for deletion and the insert.php file use for register user data and update.php will update user data and show.php file list all user data. in the config file, there is one file that is used for database connections, and using that file we can perform all the operations. At last main file is index.php where we perform all the operations. in that file, we use bootstrap for designing and all the files of bootstrap and angular js are called via CDN. let’s create index.html file.
<!DOCTYPE html>
<html lang="en">
<head>
  <meta charset="utf-8">
  <meta name="viewport" content="width=device-width, initial-scale=1, shrink-to-fit=no">
  <meta name="description" content="">
  <meta name="author" content="">
  <title>Angular JS CRUD AJAX</title>
  <!-- Bootstrap core CSS -->
  <link rel="stylesheet" href="https://stackpath.bootstrapcdn.com/bootstrap/4.4.1/css/bootstrap.min.css" integrity="sha384-Vkoo8x4CGsO3+Hhxv8T/Q5PaXtkKtu6ug5TOeNV6gBiFeWPGFN9MuhOf23Q9Ifjh" crossorigin="anonymous">
  <script src="https://ajax.googleapis.com/ajax/libs/angularjs/1.6.9/angular.min.js"></script>
</head>
<body>
<div class="container-fluid" ng-app="crudApp" ng-controller="crudController" ng-init="showData()">
	<div class="modal fade" id="modal1" tabindex="-1" role="dialog" aria-labelledby="exampleModalLabel" aria-hidden="true">
  <div class="modal-dialog" role="document">
    <div class="modal-content">
      <div class="modal-header">
        <h5 class="modal-title" id="exampleModalLabel">Insert Record</h5>
        <button type="button" class="close" data-dismiss="modal" aria-label="Close">
          <span aria-hidden="true">&times;</span>
        </button>
      </div>
      <div class="modal-body">
        <form class="form-group" name="formsubmit"> 
        	<label for="">Name</label>
        	<input type="text" name="text" class="form-control" placeholder="Enter your Name Here" required ng-model="name">
        	<label for="">Email</label>
        	<input type="text" name="email" class="form-control" placeholder="Enter your Email Address Here" required ng-model="email">
        	<label>Phone</label>
        	<input type="number" name="phone" class="form-control" placeholder="Enter your Mobile number here" required ng-model="phone">
        	<input type="hidden" ng-model="userId">
        </form>
      </div>
      <div class="modal-footer">
        <button type="button" class="btn btn-secondary" data-dismiss="modal">Close</button>
        <button type="button" class="btn btn-primary" ng-click="submitData()" data-dismiss="modal">Submit Data</button>
      </div>
    </div>
  </div>
</div>
<div class="modal fade" id="update" tabindex="-1" role="dialog" aria-labelledby="exampleModalLabel" aria-hidden="true">
  <div class="modal-dialog" role="document">
    <div class="modal-content">
      <div class="modal-header">
        <h5 class="modal-title" id="exampleModalLabel">Update Record</h5>
        <button type="button" class="close" data-dismiss="modal" aria-label="Close">
          <span aria-hidden="true">&times;</span>
        </button>
      </div>
      <div class="modal-body">
        <form class="form-group"> 
        	<label for="">Name</label>
        	<input type="text" name="text" class="form-control" placeholder="Enter your Name Here" required ng-model="name">
        	<label for="">Email</label>
        	<input type="text" name="email" class="form-control" placeholder="Enter your Email Address Here" required ng-model="email">
        	<label>Phone</label>
        	<input type="number" name="phone" class="form-control" placeholder="Enter your Mobile number here" required ng-model="phone">
        	<input type="hidden" ng-model="userId">
        </form>
      </div>
      <div class="modal-footer">
        <button type="button" class="btn btn-secondary" data-dismiss="modal">Close</button>
        <button type="button" class="btn btn-primary" ng-click="update()" data-dismiss="modal">Update Data</button>
      </div>
    </div>
  </div>
</div>
	<h2 class="text-center text-info">CRUD Operation With Angular JS And PHP</h2>

<div id="alertMessage">
	
</div>
		<div class="d-flex justify-content-end">
			<button class="btn btn-success mr-3" data-toggle="modal" data-target="#modal1">Add</button>
		</div>
		<div class="table-responsive">
			<table class="table table-striped mt-3">
				<thead>
					<tr>
						<th>
							Name
						</th>
						<th>
							Email
						</th>
						<th>
							Phone
						</th>
						<th>
							UPDATE
						</th>
						<th>
							DELETE
						</th>
					</tr>
				</thead>
				<tbody  ng-repeat="data in dataset">
					<td>{{ data.name }}</td>
					<td>{{ data.email }}</td>
					<td>{{ data.phone }}</td>
					<td><button class="btn btn-warning text-white" ng-click="updateData(data.id)" data-toggle="modal" data-target="#update">UPDATE</button></td>
					<td><button class="btn btn-danger" ng-click="deleteData(data.id)">DELETE</button></td>
				</tbody>
			</table>
		</div>
</div>
  <script src="https://code.jquery.com/jquery-3.4.1.slim.min.js" integrity="sha384-J6qa4849blE2+poT4WnyKhv5vZF5SrPo0iEjwBvKU7imGFAV0wwj1yYfoRSJoZ+n" crossorigin="anonymous"></script>
  <script src="https://cdn.jsdelivr.net/npm/popper.js@1.16.0/dist/umd/popper.min.js" integrity="sha384-Q6E9RHvbIyZFJoft+2mJbHaEWldlvI9IOYy5n3zV9zzTtmI3UksdQRVvoxMfooAo" crossorigin="anonymous"></script>
  <script src="https://stackpath.bootstrapcdn.com/bootstrap/4.4.1/js/bootstrap.min.js" integrity="sha384-wfSDF2E50Y2D1uUdj0O3uMBJnjuUD4Ih7YwaYd1iqfktj0Uod8GCExl3Og8ifwB6" crossorigin="anonymous"></script>
</body>
</html>
this file will look like this, once you click add button you will see a modal like this. so in this tutorial, we used only three records for user registration, you can use anything you want. going through config file and database connectivity. show.php file
<?php
$servername = "localhost";
$username = "root";
$password = "";
$dbname = "your_db_name";
try {
$dbconn = new PDO("mysql:host=$servername;dbname=$dbname", $username, $password);
// set the PDO error mode to exception
$dbconn->setAttribute(PDO::ATTR_ERRMODE, PDO::ERRMODE_EXCEPTION);
} catch(PDOException $e) {
echo "Connection failed: " . $e->getMessage();
}
?>
lets create code for show.php and insert.php file and call API using ajax in angular JS.
<?php
require_once '../config/db_config.php';
$query = "SELECT * FROM table_name ORDER BY id DESC";
$selectDataQuery = $dbconn->prepare($query);
$selectDataQuery->execute();
$rowsData = $selectDataQuery->rowCount();
if($rowsData > 0){
$fetchData = $selectDataQuery->fetchAll(PDO::FETCH_ASSOC);
}else{
	$fetchData = [];
}
echo json_encode($fetchData);
?>
so in the show.php file, we used simple PHP code where we can see that we used simple to fetch all data from the database and store it in one variable then we just passed encoded JSON as output. what happened when we call an API for this file and how it works let’s see, create ajax for show.php file and call it using ajax
<Script>

  	var app = angular.module('crudApp', []);

  	app.controller('crudController',function($scope,$http){
  		$scope.showData = function(){
  			$http.get('api/show.php').then(function (response){
        	$scope.dataset = response.data;
        });
     }    

so in the above code, we can see that we used angular js module and scope and controller so if you don’t know what this all thing then please complete the basics of angular js which is available here. so we set response data for the dataset variable and we used the ng-repeat angular js function which is used for pass array just like for loop in other languages. lets create insert.php file and ajax for insert data.
<?php
require_once('../config/db_config.php');
$data = json_decode(file_get_contents("php://input"),true);
$name = mysql_real_escape_string($data['name']);
$email = mysql_real_escape_string($data['email']);
$phone = mysql_real_escape_string($data['phone']);
$submitFor = mysql_real_escape_string($data['submitFor']);
$id = mysql_real_escape_string($data['id']);
if($submitFor == 'insertData'){
  $query = "INSERT INTO `table_name`(`name`, `email`, `phone`) VALUES ('$name','$email','$phone')";
  $insertQuery = $dbconn->prepare($query);
  if($insertQuery->execute()){
    echo '<div class="alert alert-success alert-dismissible fade show" role="alert">
    <strong>Success !</strong> your Data is submitted.
    <button type="button" class="close" data-dismiss="alert" aria-label="Close">
    <span aria-hidden="true">&times;</span>
    </button>
    </div>';
  }else{
    echo '<div class="alert alert-danger alert-dismissible fade show" role="alert">
    <strong>Sorry !</strong> your Data submission is failed.
    <button type="button" class="close" data-dismiss="alert" aria-label="Close">
    <span aria-hidden="true">&times;</span>
    </button>
    </div>';
  }  
}elseif ($submitFor == 'updateData') {
  $query = "UPDATE `table_name` SET `name`='$name',`email`='$email',`phone`='$phone' WHERE id=$id";
  $updateQuery = $dbconn->prepare($query);
  if($updateQuery->execute()){
    echo '<div class="alert alert-success alert-dismissible fade show" role="alert">
    <strong>Success !</strong> your Data updated.
    <button type="button" class="close" data-dismiss="alert" aria-label="Close">
    <span aria-hidden="true">&times;</span>
    </button>
    </div>';
  }else{
    echo '<div class="alert alert-danger alert-dismissible fade show" role="alert">
    <strong>Failed !</strong> Failed to update Data.
    <button type="button" class="close" data-dismiss="alert" aria-label="Close">
    <span aria-hidden="true">&times;</span>
    </button>
    </div>';
  }
}

?>
so in the above code, we can see that we used something which maybe you show the first time and it is the file_get_contents PHP function which is used to get data from API or retrieve data from form-data. when we are using the angular js ajax method then we pass the data in form-data which is you can see under the network tab. when we are passing data from angular js and it is passed in API as encoded JSON format so first of all we need to decode the data and then retrieve all data one by one. so if you notice that we used to submit for variable in which we check that is this form submit for update data or just insert data so we used the same file for doing both works for us.
$scope.submitData = function(){
      $http.post('api/insert.php',{'id':$scope.userId,'name':$scope.name,'email':$scope.email,'phone':$scope.phone,'submitFor':'insertData'}).then(function(res){
      	$("#alertMessage").append(res.data);
      	$scope.showData();
      });
     }
here is the AJAX call for the insert data from the Form. so here you can see that we passed different parameters in the ajax call which are id, name, email, phone, and submit for so all data will be passed in insert.php file as encoded JSON format and then we decode them and use them for our task. lets create update and delete functionality.
<?php
require_once '../config/db_config.php';
$udata = json_decode(file_get_contents("php://input"),true);
$id = $udata['id'];
$query = "SELECT * FROM table_name where id=$id";
$selectDataQuery = $dbconn->prepare($query);
$selectDataQuery->execute();
$rowsData = $selectDataQuery->rowCount();
if($rowsData > 0){
$fetchData = $selectDataQuery->fetchAll(PDO::FETCH_ASSOC);
	foreach ($fetchData as $data) {
		$userData['name'] = $data['name'];
		$userData['email'] = $data['email'];
		$userData['phone'] = $data['phone'];
	}
}else{
          $userData= [];
     }
echo json_encode($userData);
?>

so in the above code, we are using the show function but this time we don’t want to show all data we only want to show some particular user data so for this we used user_id so each time when the user clicks update function the update function is called and passed id to API.
$scope.updateData = function(id){
     	$http.post('api/update.php',{'id':id}).then(function(res){
     		$scope.name = res.data['name'];
     		$scope.email = res.data['email'];
     		$scope.phone = parseInt(res.data['phone']);
     		$scope.userId = id;
     	});
     }
so the above code sets the response data for the particular field. so after clicking the update button you can see this modal with user data when we click the update Data button this will again call insert.php file but submit for will update data so this time that will not create a new user that will update particular user data.
$scope.update = function(){
$http.post('api/insert.php',{'id':$scope.userId,'name':$scope.name,'email':$scope.email,'phone':$scope.phone,'submitFor':'updateData'}).then(function(res){
      	$("#alertMessage").append(res.data);
      	$scope.showData();
      });
     }

lets create delete functionality. so one of the easiest methods is to delete data from the database. so in this method, we just gonna use the id for the deletion. this is the easiest method so we don’t need to use too much complex code for this.
$scope.deleteData = function(id){
     	if(confirm('Are you sure ?')){
     		$http.post('api/delete.php',{'id':id}).then(function(res){
     			$("#alertMessage").append(res.data);
	      	$scope.showData();
	      });
     	}
     }
so here is the API code for the deletion operation.
<?php
require_once('../config/db_config.php');
$data = json_decode(file_get_contents("php://input"),true);
$id = $data['id'];
$deleteQuery = "DELETE FROM table_name where id = $id";
$deleteqry = $dbconn->prepare($deleteQuery);
if($deleteqry->execute()){
	echo '<div class="alert alert-success alert-dismissible fade show" role="alert">
    <strong>Success !</strong> your Data successfully deleted.
    <button type="button" class="close" data-dismiss="alert" aria-label="Close">
    <span aria-hidden="true">&times;</span>
    </button>
    </div>';
}else{
	echo '<div class="alert alert-danger alert-dismissible fade show" role="alert">
    <strong>Failed !</strong> failed to delete data.
    <button type="button" class="close" data-dismiss="alert" aria-label="Close">
    <span aria-hidden="true">&times;</span>
    </button>
    </div>';
}
?>
that’s it guys if you getting any errors let us know in the comment and learn vagrant for Symfony.
setup vadrant for symfony
Symfony Development

Setup Vagrant For Symfony project on windows

In this tutorial, we have explained how to Setup Vagrant For Symfony project for Windows. Vagrant is a tool for building and managing virtual machine environments in a single workflow. With an easy-to-use workflow and focus on automation, Vagrant lowers development environment setup time, increases production parity, and makes the “works on my machine” excuse a relic of the past. Vagrant is an open-source software product for building and maintaining portable virtual software development environments, e.g., for VirtualBox, KVM, Hyper-V, Docker containers, VMware, and AWS, In this tutorial we are setup vagrant by VirtualBox provider, As VirtualBox is supported to windows. Step 1: Take clone of symfony project First, please take clone of symfony project, for which you want to setup the vagrant Step 2: Take clone of vagrant Repository Please take clone of the vagrant repository, and then please Select the branch specific to what you’re working on ( Navigate to vagrant Folder ) Step 3: Install vagrant plugin Please run the below command, it’ll take few seconds vagrant plugin install vagrant-bindfs If you face this error `bash: vagrant: command not found` during installation of vagrant plugin, first you have to install Vagrant. Step 4: Adjust the artifact path Find the settings.yml file in the Vagrant folder and adjust the artifact path to point to the repositories cloned in steps 1 If you setup this vagrant for symfony then you have to put your project path to app, & if you are working with wordpress then please put to www. Step 5: Add your host-url to host file Add the following lines to your hosts file ( C:\Windows\System32\drivers\etc\hosts ): 192.168.100.100 example.test www.example.test join.example.test Name of the virtual host by which you want to access your project.
Note: For open the host file, you have to open as Administration, otherwise will not allow to edit it.
Step 6: Install virtualbox Now if you run the `vagrant up`, you’ll face the error, so first you need to install VirtualBox For windows. https://www.virtualbox.org/wiki/Downloads – just click on Windows hosts. Step 7: vagrant up Now feel free to run the command with provideName. vagrant up –provider=virtualbox There will be deprecation warnings and errors, but despite that everything should install okay Step 8: Navigate to project Navigate to https://www.example.test/ ( run this url in browser ). That’s all, now you project run with above host url. Conclusion: I hope this tutorial helpful for you, if you have any issue with setup, please comment below, We will back to you As soon as possible. Thank You! 🙂
1
PHP Development

How to send SMS using PHP

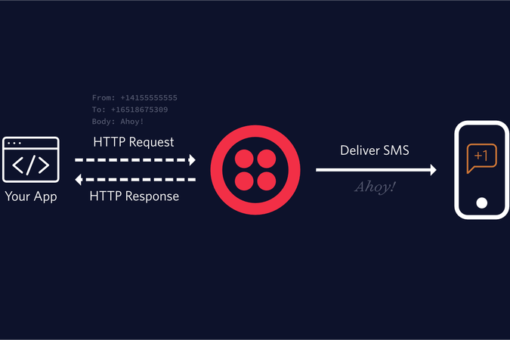
In this tutorial, we have explained how to send SMS using PHP. There are many SMS API service providers like Twilio, Nexmo, MSG91, Text local that you can use to send SMS using the PHP programming language. In this tutorial we learned how to send SMS using twilio API service provider. Twilio’s APIs (Application Programming Interfaces) power its platform for communications. Behind these APIs is a software layer connecting and optimizing communications networks around the world to allow your users to call and message anyone, globally. Twilio has a whole host of APIs, from SMS to Voice to Wireless! Step 1: Register for Twilio account Sign Up for free twilio account from here :  Step 2: Verify Phone Number Next, we need to create a phone number for your account from which you can send the SMS Click -> “Phone Numbers” in the sidebarClick -> “Get a number now” link to generate your own phone numberNow “Click -> Get your first Twilio phone number”.Once you click “Get your first Twilio phone number”, a new pop-up window will show your Twilio Phone Number. Now, click “Choose this Number”. Step 3: Create API Credentials Next, you need to get your account SID and your authorization token.On the Console Dashboard page you can get your credentials. Step 4: Install PHP SDK The method of installing the SDK is via composer
composer require twilio/sdk
The another method of installing the SDK without composer is possible to download and use the PHP SDK manually and unzip SDK folder into your project directory. You can download from here. Step 7: Create Integration
<?php

require __DIR__ . '/vendor/autoload.php'; //with composer
// based on where you downloaded and unzipped the SDK
require __DIR__ . '/twilio-php-main/src/Twilio/autoload.php'; //without composer
use Twilio\Rest\Client;

// Your Account SID and Auth Token from twilio.com/console
$account_sid = 'ACXXXXXXXXXXXXXXXXXXXXXXXXXXXXXXXX';
$auth_token = 'your_auth_token';

// In production, these should be environment variables. E.g.:
// $auth_token = $_ENV["TWILIO_AUTH_TOKEN"]

// A Twilio number you own with SMS capabilities
$twilio_number = "+15558675309";

$client = new Client($account_sid, $auth_token);
$client->messages->create(
    // Where to send a text message (your cell phone?)
    '+15017250604',
    array(
        'from' => $twilio_number,
        'body' => 'My first trial SMS!'
    )
);
Step 5: Receiving a SMS Here you go! Note: Trial accounts cannot send messages to unverified numbers; verify +9198XXX42887 at twilio.com/user/account/phone-numbers/verified, or purchase a Twilio number to send messages to unverified numbers. Conclusion: I hope this tutorial helpful for you, if you have any issue with integration, please comment below. Thank You!
×