
Installation Webpack Encore bundle Symfony4.4
Before staring installation of Webpack Encore bundle, Let’s take a look in Why this bundle need to be install ?
- In earlier version of symfony ( till 3.4 ) we used Assetic Bundle for provides integration of the Assetic library into the Symfony framework.
- As of Symfony 4.0, Symfony applications Deprecated this Bundle from Symfony Application.
- CAUTION: Now, Symfony applications should use Webpack Encore , instead of Assetic Bundle.
First, make sure you install Node.js and also the Yarn package manager. The following instructions depend on whether you are installing Encore in a Symfony application or not.
Step 1: Install Node.js
https://nodejs.org/en/download/ Form here, you can down load Node.js for WindowOs as well as MacOs.
Step 2: Yarn Installation
You can install yarn via below command…
npm install -g yarn
Should you later want to update Yarn to the latest version, just run:
yarn set version latest
Step 3: Installing Encore in Symfony Applications
Run these commands to install both the PHP and JavaScript dependencies in your project:
- composer require symfony/webpack-encore-bundle
- yarn install
If you are using Symfony Flex, this will install and enable the WebpackEncoreBundle, create the assets/ directory, add a webpack.config.js file, and add node_modules/ to .gitignore. You can skip the rest of this article and go write your first JavaScript and CSS by reading Encore: Setting up your Project!
If you are not using Symfony Flex, you’ll need to create all these directories and files by yourself…
Step 4: Configuring Encore/Webpack
Everything in Encore is configured via a webpack.config.js file at the root of your project. It already holds the basic config you need:

The key part is addEntry(): this tells Encore to load the assets/app.js file and follow all of the require() statements. It will then package everything together and – thanks to the first app argument – output final app.js and app.css files into the public/build directory.
To build the assets, run:

Congrats! You now have three new files:
public/build/app.js(holds all the JavaScript for your “app” entry)public/build/app.css(holds all the CSS for your “app” entry)public/build/runtime.js(a file that helps Webpack do its job)
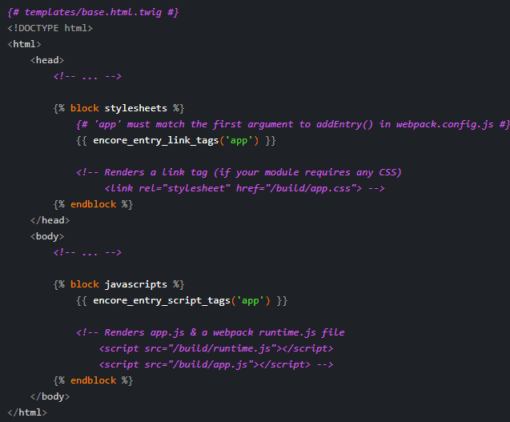
Next, include these in your base layout file. Two Twig helpers from WebpackEncoreBundle can do most of the work for you:
-
{{ encore_entry_link_tags('app') }} & {{ encore_entry_script_tags('app') }}
{{ encore_entry_link_tags('app') }}(For css complied){{ encore_entry_script_tags('app') }}(For js complied)
For Example..
Compiling Only a CSS File
If you want to only compile a CSS file, that’s possible via addStyleEntry():
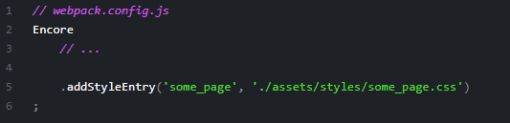
This will output a new some_page.css.
Conclusion: I hope this tutorial helpful for you, if you have any issue regarding this blog, please comment below, we’ll be soon back to you.
Thank You!
4 thoughts
valuable blog
There is noticeably a package to know about this. I presume you made sure nice points in functions also. Loyd Ragazzo
This is the right blog for everyone who would like to understand this topic.
You understand so much its almost tough to argue
with you (not that I actually would want to…HaHa).
You definitely put a brand new spin on a topic that’s been written about for years.
Excellent stuff, just great!
Excellent article. Keep posting such kind of info on your
page. Im really impressed by your blog.
Hello there, You have done an excellent job. I will certainly digg it and personally suggest to my friends.
I am confident they will be benefited from this website.